As I’ve been working on the shelf, bike rack and lumber box this week, I’ve been practicing with the Wacom some more. This thing is going to take a long time to get used to. I can see where it would already be valuable for coloring sketches or doing really loose stuff like The Last Stronghold. For precise drawing, it takes a lot of effort. I tried doing The Thing a couple of weeks ago and eventually just did it by hand. This week I was determined that I would get something decent done 100% on the tablet. I present to you my version of Wonder Woman. I’ll be following this tutorial for digital coloring in one of the coming weeks. I’m looking forward to that part. I think it will be much more fun and easy than the line art.
Of course, Wonder Woman is owned and protected by DC Comics. I am not claiming the character is my creation.
This week’s Thing of the Week is a repurposing of space. This shop space didn’t have any dedicated scrap wood storage so I drew up a plywood box to put it in. This consolidation frees up most of one wall for additional storage. Next a vertical bike rack was designed to go on the wall where the scrap wood was stored. Previously the bikes did not have a dedicated storage space and were constantly in the way.
The box is a very straightforward design with the front side at 18″ tall and the back at 36″. It will be made out of 1/2″ plywood.
The bike rack will be a vertical 2″x4″ resting on a plywood base and attached to a roof rafter with screws. Some sort of cover will be incorporated for the bikes as this room gets very dusty when the table saw is used. I may treat it like a giant weighted shower curtain that attaches to the ceiling and drops straight down to the floor via pulleys. I may spec two bike/motorcycle covers or maybe BBQ grille covers. The room is white so I’d like to find a slick white fabric if I go the curtain route. Maybe parachute material.
If you guys have any suggestions on how to handle the cover, I’m very interested. I think having something that opens like a shower curtain will just get in the way. Zippers will probably be too much work and could get clogged with sawdust.
I toyed around with packing the bikes in and having a small storage area above, but I didn’t like how the bikes would have to be supported to achieve this nor was the storage space all that useful. I think the better bet will be having the cross member on the bike level (tilting the bike forward). It will make for easier storage and easier and stronger supports.
I was surprised at how much time I spent on this redesign, but there were several options to consider. I’ll post some pictures once the box and the bike rack are complete.
Also, for those waiting on images of the finished shelf from last week, you’ll have to wait a little bit longer. I’m waiting until it warms up again just to make sure the finish cures quickly enough to minimize garbage getting stuck in it when it is tacky.
Welcome back true believers! Thanks again for showing an interest in what I do. I really appreciate it.
This week I jumped back into the tried and true area of furniture design.
When I tore out and redid my kitchen a few years ago, I built the cabinets out of this really beautiful wood I hadn’t heard of before called Pacific Coast White Birch. Sure you’ve heard of birch but this stuff looks different. It has a silvery color as opposed to the sort of bleached yellowish white of birch veneer plywood or poplar. The grain pattern is more noticeable than regular birch but not overbearing like pine. It is easy to work with, a little heavy and it smells great when you cut it.
Anyway, I had some left over from the kitchen project and had kept it stored flat and wrapped in a tarp during the intervening years. I have tripped over this bundle of wood so many times it was a joy to think that I’d finally found a worthwhile use for it and I’d finally get that part of my shop floor back.
The first two days of the week were spent finalizing a design for a console table for our living room. There was an initial design several months ago, but since then I’d come to realize that it could be better. You were right Autumn. It was just too beefy.
Paper Minis - Original on Left Revised on Right
With the design complete I went out in the shop to calculate exactly how much wood I had. Ancient cat litter and dust went everywhere when I unwrapped the tarp. To my dismay, most of what was wrapped up was plywood, drawer sides and base molding I’d made for the kitchen. There were only two pieces of birch!
A quick stroll through our budget showed me that we simply don’t have the money to buy wood for projects right now so I had to come up with something else to make. I decided on an entryway shelf with drawers and a TV room end table. Both of these will show off the wood nicely and should be buildable from the stock I have left. Since the shelf should be quicker and I’d already used up about half the week, I decided to do that one first.
I spent another half of a day trying to come up with a way to incorporate drawers into the shelf. It would be great to have a place to dump keys, wallet, mail, etc right when you come in the house. Our entryway is in proportion to our house, which is to say tiny. This meant the shelf had to be minimal to maintain a nice proportion. Every time I tried to integrate drawers of a useful size, the whole thing became too bulky.
Closest I Came to Success - Recessed Drawers Below Shelf
My favorite thing about the design is that the top of the shelf is made from a single 10” wide piece of wood. I love the way it looks!
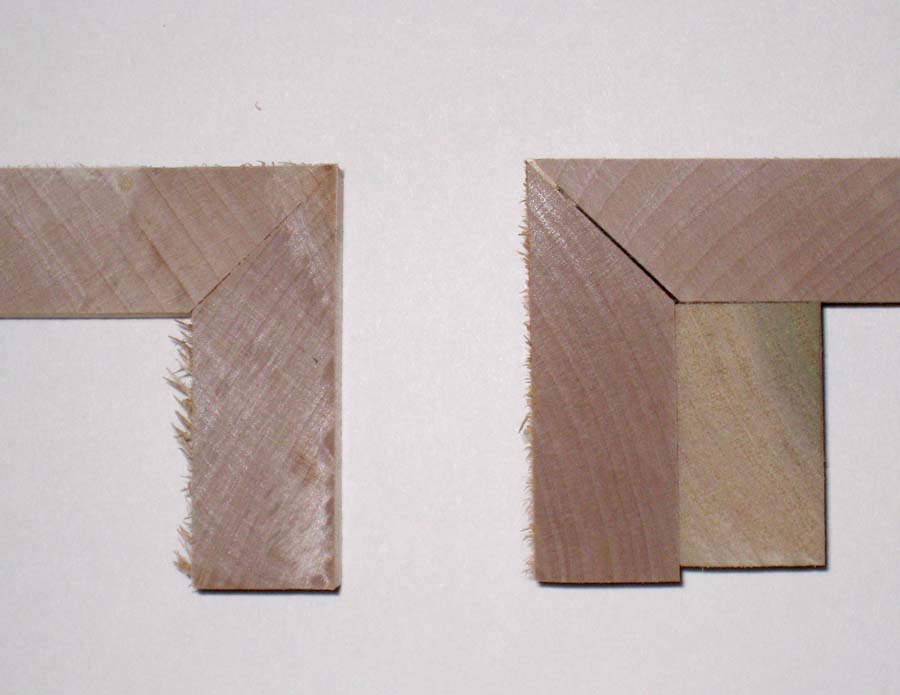
The construction is pretty straightforward. The only time consuming part of the process was scribing the shelf to some fairly wavy walls. Since it doesn’t have a backsplash like a countertop, it has to be a really tight fit to look good.
Sadly, when I test fit it for the first time, a corner caught on a bulge in the wall and chipped up the wood before I could react. On another test fit, I dropped the shelf on its corner! I was so angry that I had to set it down and walk away for a little while. Now I’m waiting for the wood glue and putty to dry on the repairs and I should have pictures of the completed and installed product to show you all early next week.
Bashed Corner!!!
End Cuts Show Backing Block off by 1/32″ at one end – You can see the Wood Filler
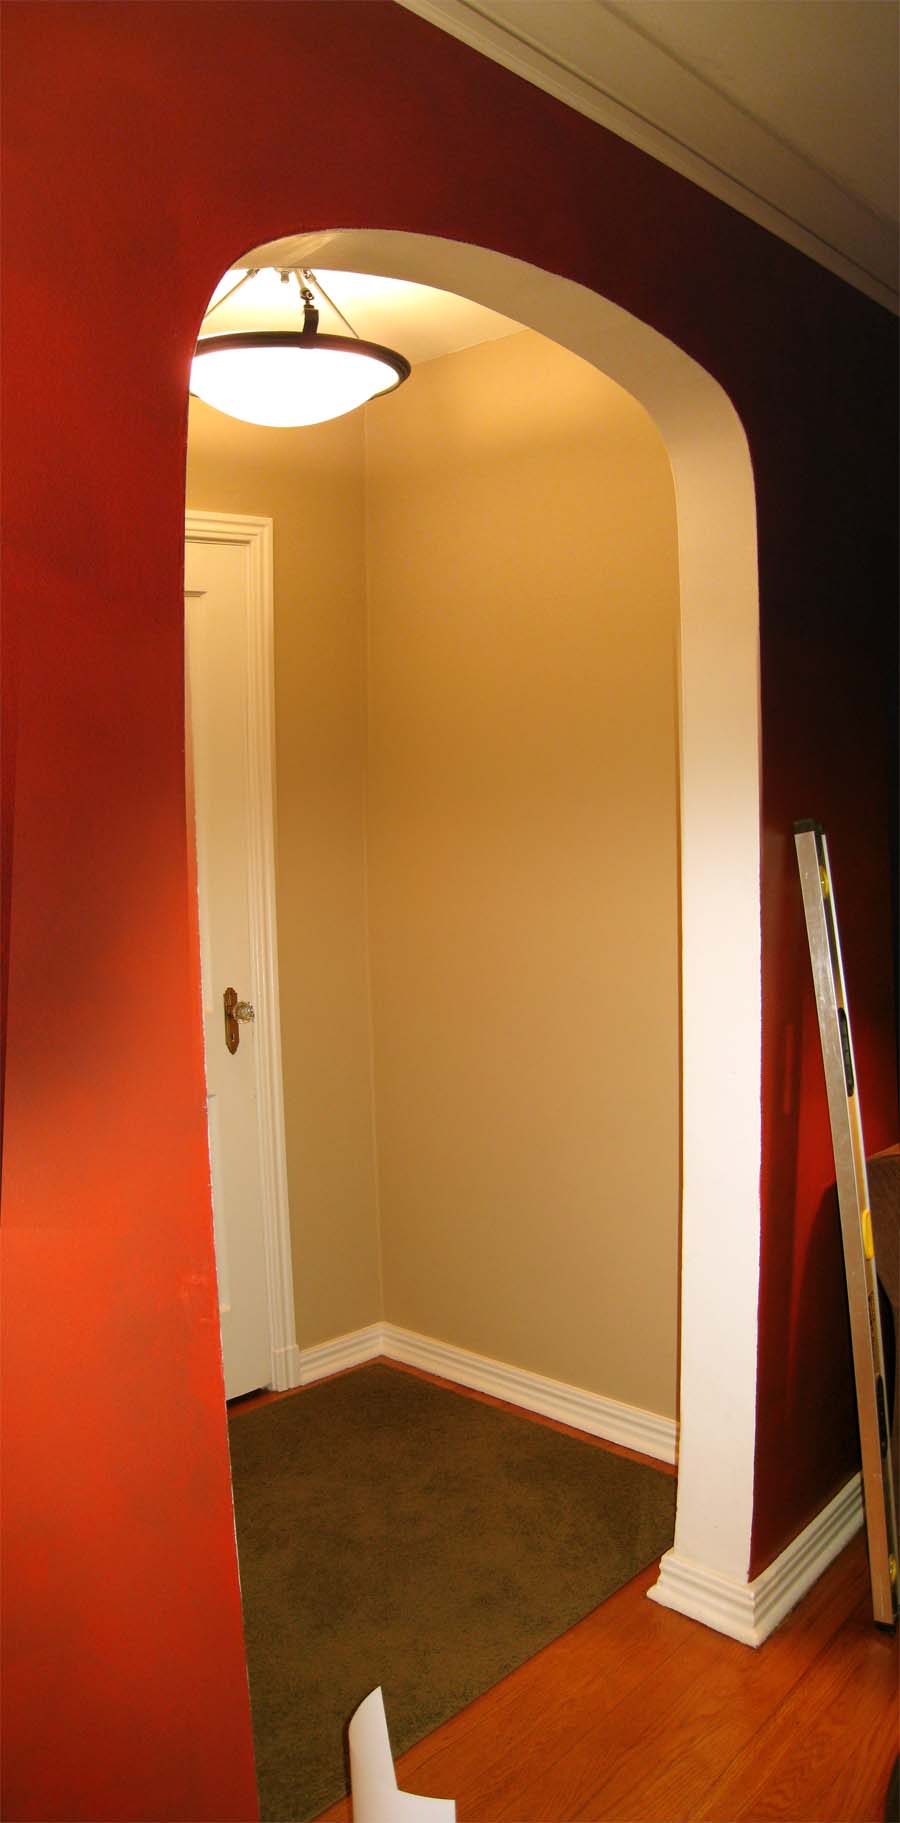
Before
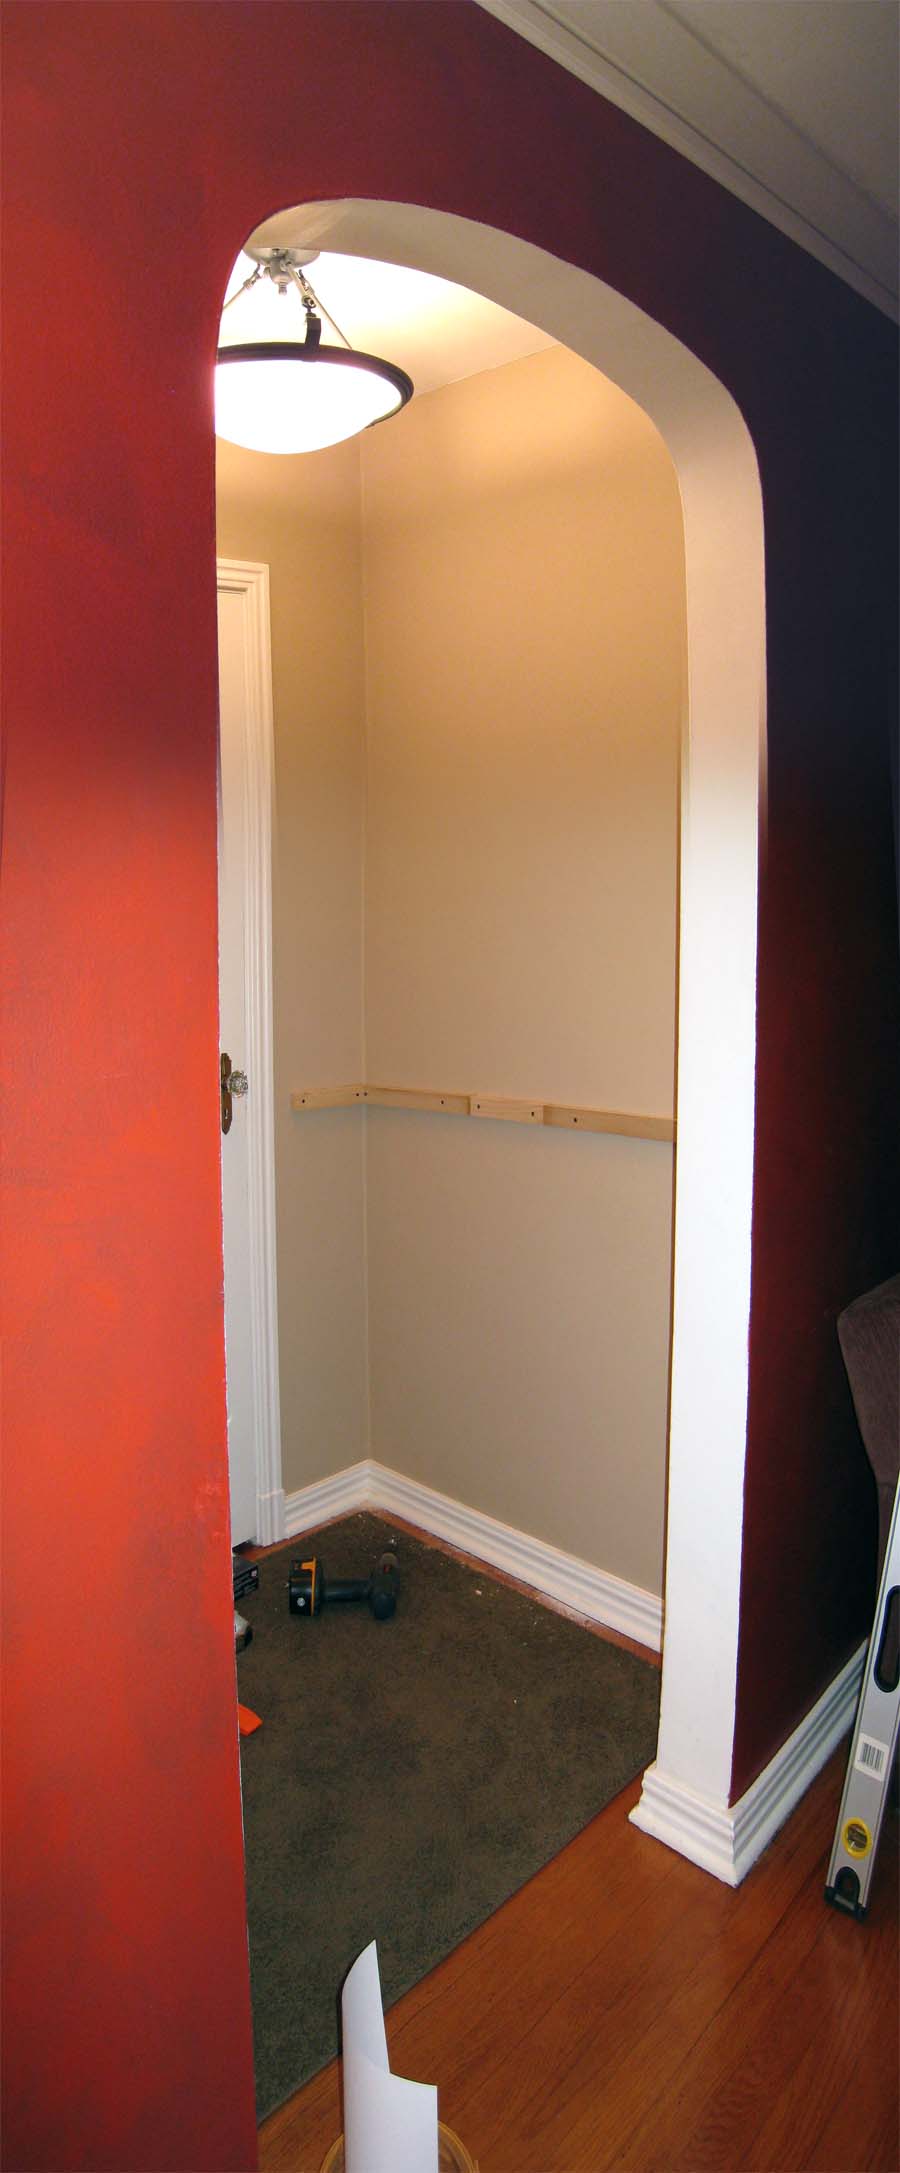
Cleat Installed on Three Walls
Test Fitting Shelf on Cleat
Since the Side Cleats don’t hit Studs I Added These Brackets
Closest I Came to Success – Recessed Drawers Below Shelf
As I’ve mentioned in past posts, I’m doing illustrations of people via the Wacom tablet and it hasn’t been going well. This week I thought I’d try a superhero to remove some of the accuracy pressure. Being one to over complicate projects, my first thought was to take someone I know and draw them as a superhero. This turned out to be somewhat maddening as I was trying to capture the likeness of two known images instead of one. Well done, Patzy.
Today, you get what may be the official thing of the week (literally) if I don’t finalize my new idea before tomorrow. You can see from the photo below some of the iterations I”ve gone through. In the center is a an exaggerated sketch/mini caricature of the subject and my two better attempts at turning him into The Thing from Marvel’s Fantastic Four. I’ve got several of the key elements that make up the subject’s face done pretty well and I think most people would recognize this as The Thing but it is still missing a lot of The Thing’s thingy-ness. I’ve decided that when drawing an orange rock man, he will probably never look enough like your subject to be identifiable unless you just do the rocks as a skin over his existing face.
I might work on this more next week.
PS I cheated. None of this was done on the tablet. My plan was to try and do comic-style inking and coloring via the tablet once I got the pencil sketch done.
PPS The Thing is a Marvel Comics character. I claim no ownership of him.
Not much to say for this week’s Thing of the Week. It is a painting of a wizard with a glowing orb in hand. Crystal ball? Magic missle just waiting to leap into a foe’s eye? I can tell you painting it and the highlights it created was by far my favorite part of the painting.
I have been working like mad to do a decent person painting for the last two weeks and it just hasn’t worked out. I’m struggling not only to learn the drawing tablet and brush settings in Photoshop but with my basic sketching ability. I have many attempts now. All have been spatula city bad. Just ask Steve what that means. I have faith that I’m doing the right kind of practicing and that I will get better at this.
Attached is the best of the worst. It is acceptable on many levels but still falls flat on others. Clothing is hard unless you go very realistic. That is part of the reason for this attempt. I hope everyone has a wizard of a weekend. It is supposed to be cold here.
What is a jellyroll lurker? Perhaps we’ll explore that more in future work. For now the quote will have to do.
This was my second attempt at a digital painting. It was a lot of fun and much faster – it only took me one day. That’s half the time of the last one. I think if I can keep this up a painting like this should be doable in two hours. It helps that I have some of the Photoshop presets set up now and that the design is my own. I’m extremely happy with the way the forest turned out. I’ve got to work on drawing bushes. My solution for this painting looks like smoke and is much too realistic. I wanted to come up with something like the ferns you find on the forest floor through out the SE US.
Incidentally, my friend John let me know that he used to do stuff with a digitizing tablet. Maybe he’ll share some of his work. Perhaps a link in the comments section of this post (hint, hint)? John is better at sketching than I am so I imagine his work is beautiful.
For last week’s Thing of the Week (published in this post) I had to take a step back and find some sort of tutorial to follow. The video I found was not as detailed as a step-by-step and I struggled to find a way to explain it until my wife said “It’s like Bob Ross but without all the specifics.” That is exactly what it is. So what you see below is not my concept, not really my color palette and mostly not my design, but I did do the entire thing from scratch and am happy with the way it turned out. I would love to give credit to the guy who originally created this but the tutorial is something I grabbed sometime ago and I see that his website no longer exists. If the original artist ever reads this, thank you very much.
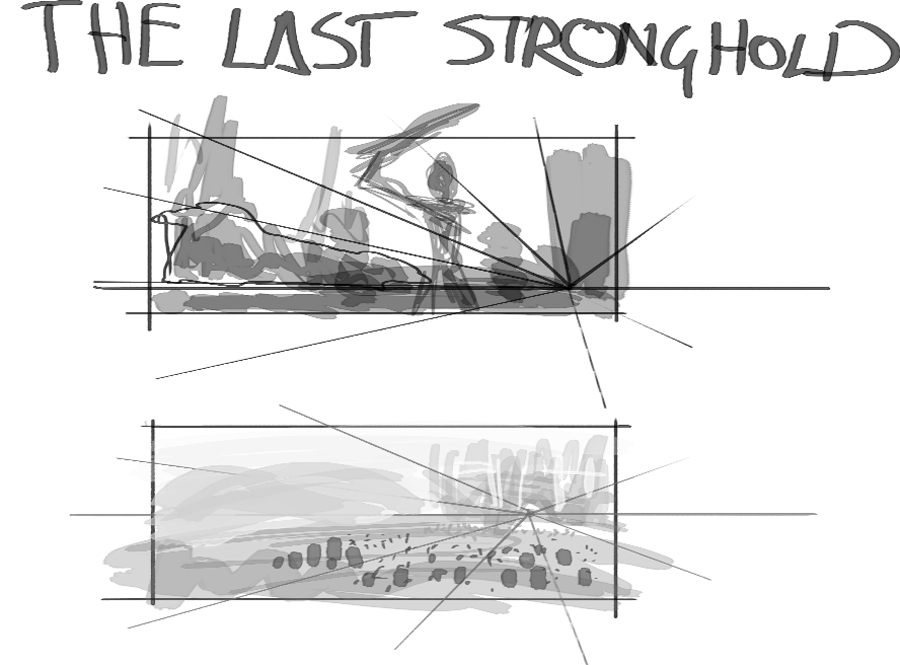
The idea was to take a phrase and generate a quick concept sketch in thirty minutes. The phrase was “The Last Stronghold” and pro doing it was able to finish in about 40 minutes. It took me about two days. Both his version and mine have problems that you’d want to correct for a rendering but I think they succeed in conveying a mood. I tend to like more gestural painterly images than tighter more realistic ones anyway. If you want realism, why not just mash up some photos in Photoshop?
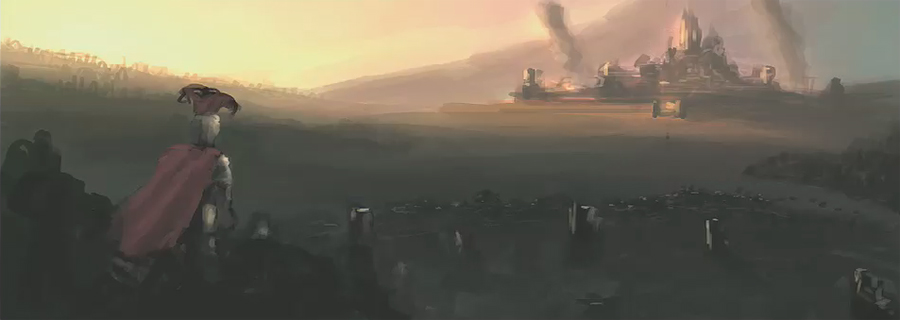
The final concept was a giant walled city near the base of a mountain. The invading army approaches with their siege engines. The city has already been softened as is evident from the smoke issuing from within. High on a rocky ledge an armored individual watches. The sun is setting.
Warm Up Page – Default Pen Settings
Thumbnails – Some Pen Settings Modified but Still Crude
Selected Thumbnail with Basic Colors Worked Out
Final Version of Concept Painting
Final Version of the Pro’s Painting – Not My Work – I will Happily Remove if the Artist Requests It
Animation of Final Concept Painting from Start to Finish
After conversing with several of you and looking in to various video hosting sites it seems that Smugmug might be the best but that costs money. Picasa looks really fantastic for photos (with even some free Photoshop-like features thrown in) but stinks for video. Vimeo (which I always thought was Vidmeo up until now) could be good too. In the end I’m trying what one of you recommended and using Photobucket.
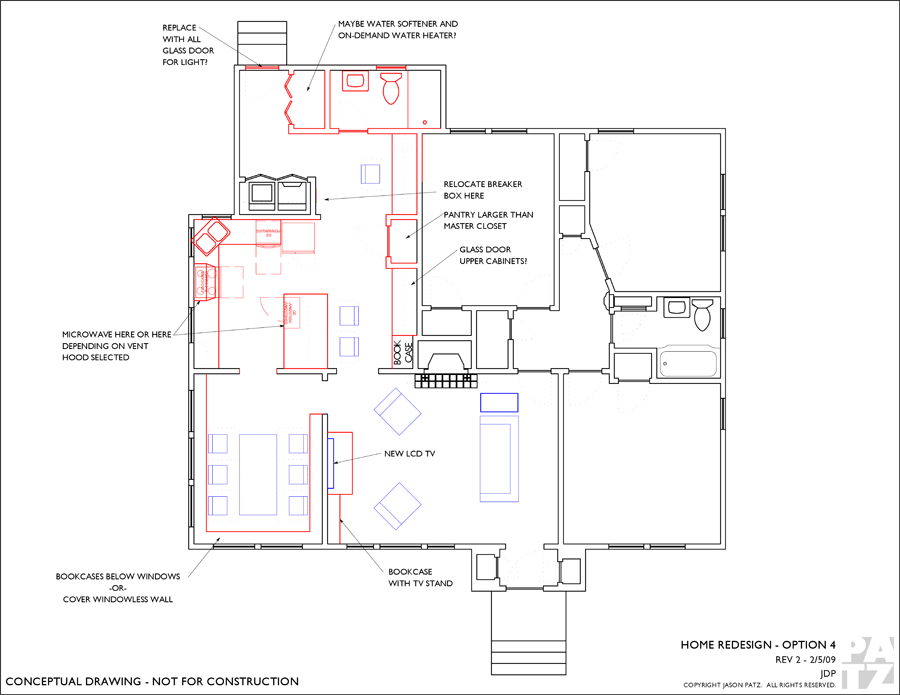
Here is the link to the 3D house redesign. It will walk you through the entire new part of the house and has some basic placeholder items to represent the built-in components I may design for the client.
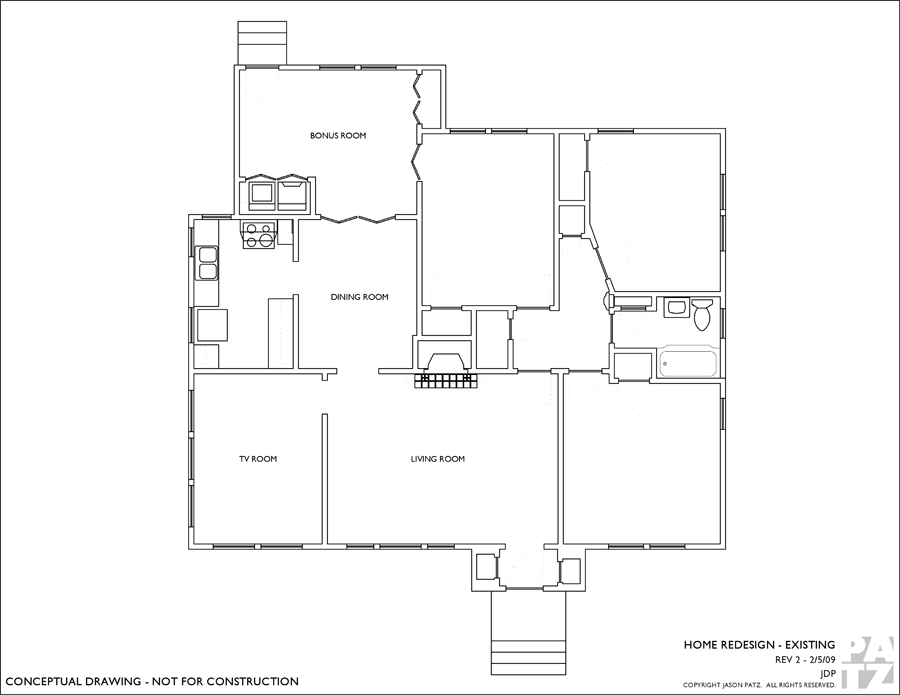
I redesigned the interior of a client’s house to incorporate a new full bathroom, the option to move their water heater inside the house, a dedicated computer station/home office, enlarged kitchen, larger TV room and more book storage. To minimize costs, the envelope of the house was not to change. I broke this rule slightly because one window in the kitchen had to be shortened to accommodate new countertops.
The project started by talking to the client about what they wanted. Next I did some rough concept sketches to see if we were on common ground. After positive feedback I measured and drew up the existing house since no blueprints were on hand. From there I modified those plans to provide the client with a few dimensionally accurate options. After a second meeting to discuss these drawings, I provided two refined concepts for final approval.
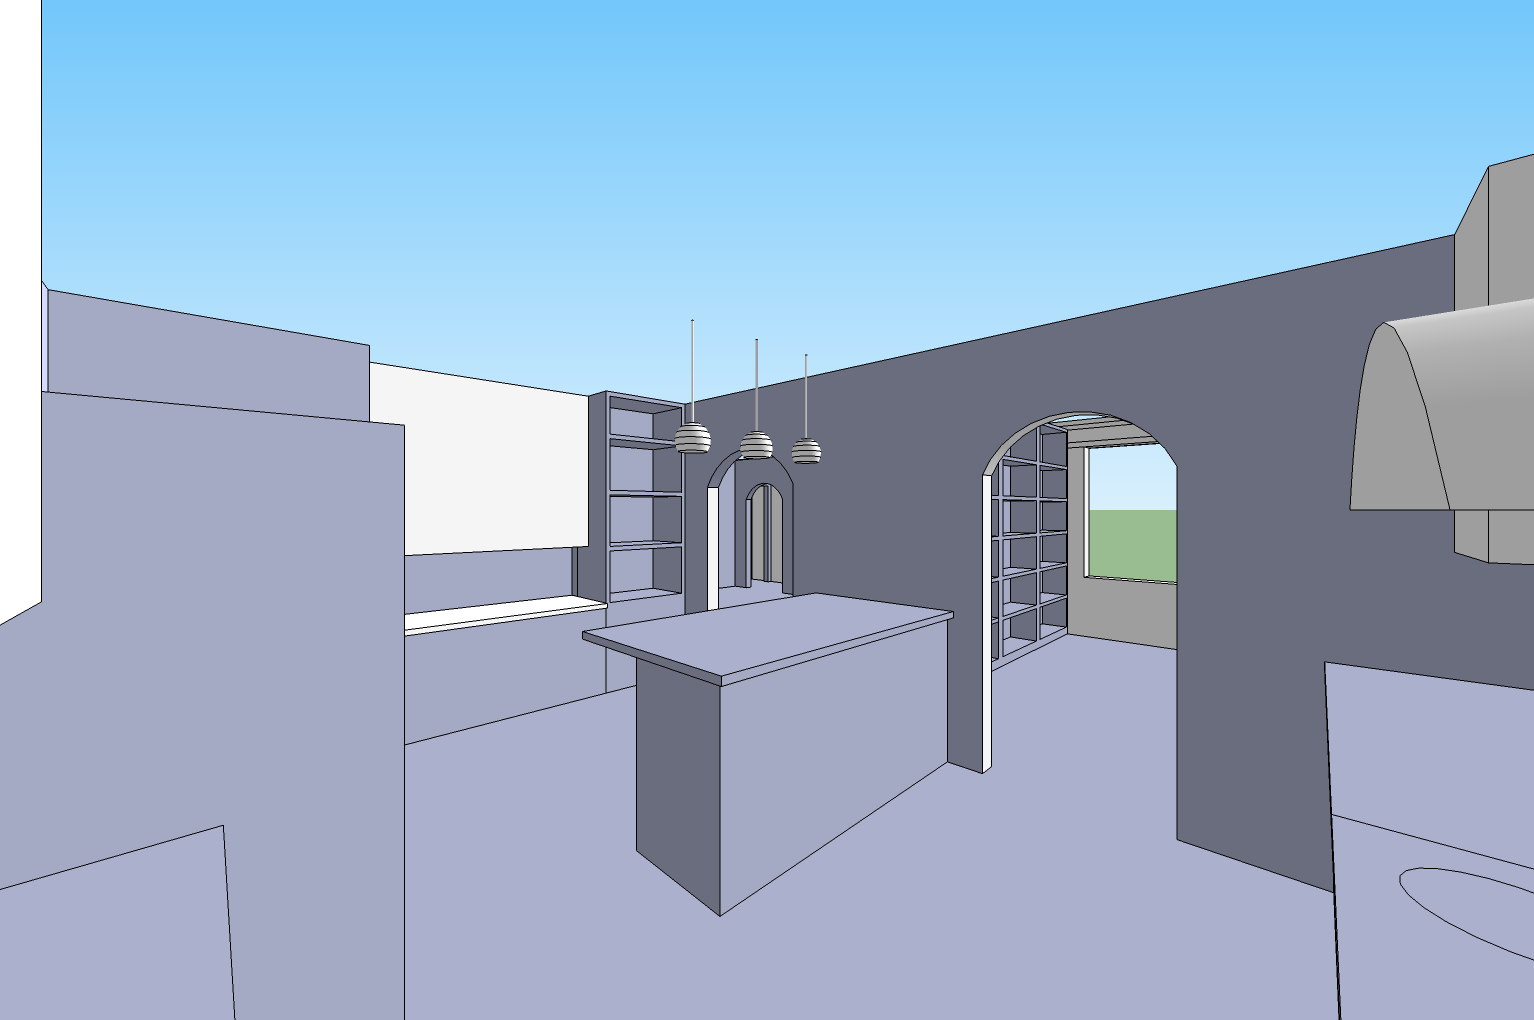
In addition, I taught myself the basics of Google’s SketchUp this week. Putting this house in 3D really helped me learn the software. There are still a lot of things to learn, but I’m happy to have generated something that is dimensionally accurate and useful even if some of the surfaces are screwy.
If any of you SketchUp masters out there have a link to a great house drawing tutorial, be sure to drop it in the comments. Lessons on how to use SketchUp Pro for house plans are worthless to me right now as SketchUp does not allow for direct import of DWG or DXF files (Why is this only a Pro feature?!).
Existing Client House
New Design – Changes in Red
Redesigned Client House Minus Roof
Living Room Showing New Entertainment Center
Dining Room Showing New Wall of Bookcases
New Kitchen Doubles Size of Old
Kitchen View Showing Island, Bookcase and Other New Storage